Introduction to GPU Programming with D3D12: Part 3 - History
Modern GPU programming has its roots in real-time 3D graphics. Understanding the history behind that will allow you to more easily understand why GPU Programming ended up being the way it is. At this point you don’t need to understand all of used techniques in detail, but rather see the idea of how graphics progressed through the years.
Note that games in this list may not be the first ones to implement respective techniques. As it turns out it is surprisingly hard to figure out which game was first to use any of those things.
Geometry transformation
The Sword of Damocles (1966) used wireframe rendering.
Objects are represented as points with lines between them. To render them, it accounts for position, rotation and scale of each object, as well as position, rotation and field of view of the camera, to project those points onto a screen. Then it can draw lines between those points to create an illusion of a 3D object.
The major downside of this approach is that it is just lines. You can not have multiple objects that block view to one another.
Triangles
I, Robot (1984) used solid triangle rendering.
By using triangle instead of line, you can define area of a screen that can be filled. However, that by itself does not yet solve the occlusion problem. To get proper occlusion you also need to ensure that object that is closer to camera is drawn on top of objects that are further from camera.
We can achieve that by sorting objects based on distance to camera, so that in the resulting list we first have objects that are in the back, and in the end are objects that are in the front, aka back to front sorting. That way, any pixel filled by objects in the back can be overwritten by objects in the front, effectively implementing occlusion. This is also known as a Painter’s algorithm.
There’s one more issue though, you also need to ensure correct occlusion between different triangles within your object. That means that you also need to also sort triangles within the object back to front. But there’s one more trick we can use to cut down on number of triangles we need to sort and draw. For each triangle, we can define direction which it will be facing. With that information we can check whether it faces towards or away from camera. We know that all triangles that we’ll end up seeing must face the camera, so we can just skip all the triangles facing away from camera. That is known as back-face culling.
Texturing
Ultima Underworld: The Stygian Abyss (1992) used texture mapping.
This allows triangles to not just be solid color filled. This is done by mapping a Texture, which you can think of as a 2D grid of colors, to a triangle. Each vertex is mapped to a point on that texture, and when you draw a triangle, you can interpolate position on a texture based on distance to vertices of a triangle, read the value from that point on a texture and then use that color for the pixel.
Note that there was another game called Catacomb 3D (1991), which used similar technique a year earlier, but it did not allow moving camera up or down, so it wasn’t true 3D graphics in the modern sense.
Depth Buffer
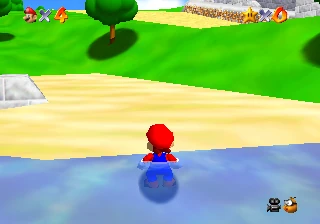
Super Mario 64 (1996) used depth buffer.
Up to now you had to sort all objects and triangles back to front to get correct order. But there’s another method. What if instead of sorting triangles, we’ll just keep track of how far is each pixel from the camera? For that we’ll create texture the size of the screen, in which each pixel will store float value corresponding to distance from the camera. That way we can skip the sorting of objects and triangles, as well as get additional information about resulting image that we can later use for some additional effects.
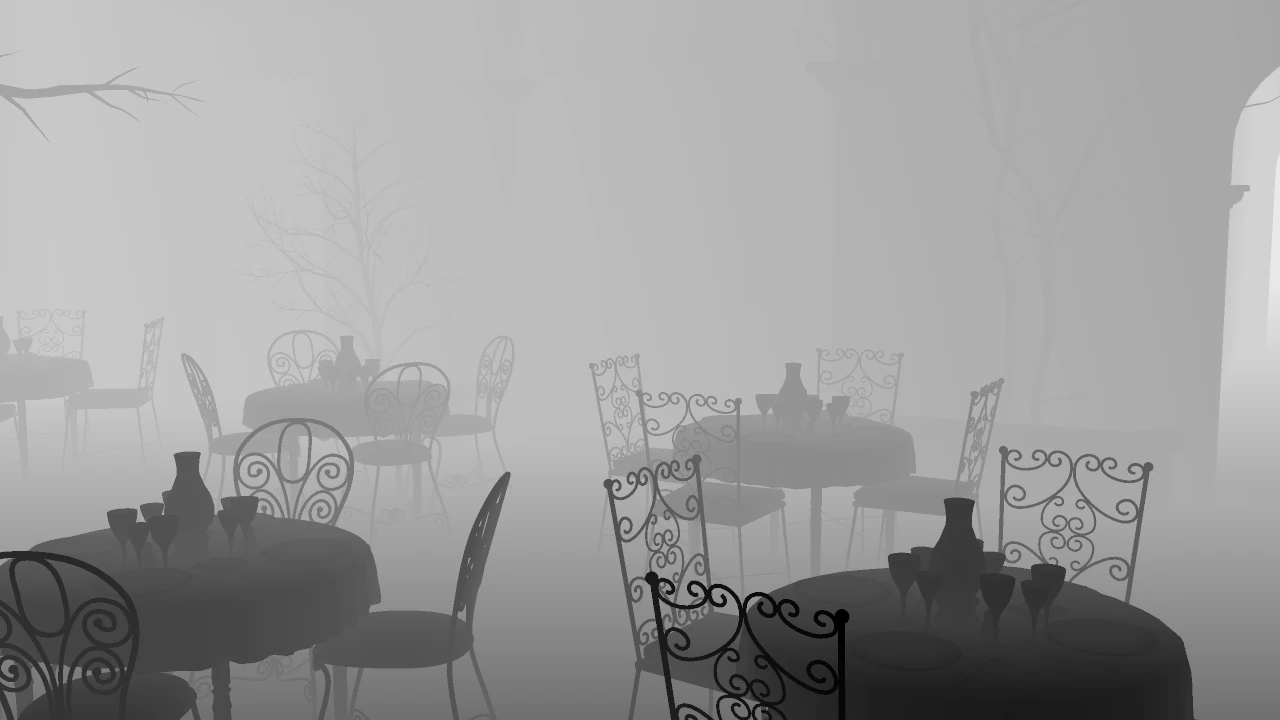
Here’s an example of how depth buffer may look. Click for see full resolution image.
Also, since you no longer need to have defined back to front order, with this method you can also handle cases of intersecting objects and triangles. In case of Super Mario 64 it allows Mario to jump into the water.
Another interesting thing to look at, is how would the game look like, if it didn’t have correct geometry ordering. Since Super Mario 64 relies solely on depth buffer for that, if you disable it, you’ll be able to observe the kind of issues you get as a result of incorrect ordering.
Lighting
Unreal (1998) used shaded lighting.
Let’s rehash how you draw a triangle: First you get your vertices, perform certain calculations for each vertex, specifically mapping to points on the screen, find out the set of pixels on the screen that belongs to the triangle, and for each pixel perform calculations required for texture mapping. That’s good, but why not perform more computations so we can try getting more realistic results.
What Unreal did was calculate lighting per vertex. Since you know the position of vertex in the scene, you can loop over all relevant light sources and for each one calculate how much light does the surface get near the vertex. Sum up results from all lights, and you get lighting for your vertex. Then, when drawing each pixel, in addition to interpolating texture coordinates, interpolate lighting result and you get basic lighting. Fun fact, this is the first game that runs on an Unreal Engine and is the reason for engine’s name.
Silent Hill 2 (2004) used per-pixel shaded lighting.
Same idea as what you can see in Unreal, but instead of calculating lighting per vertex and then interpolating results, Silent Hill 2 does calculations per-pixel, which provides more accurate results.
On the video you can clearly see the difference between per-vertex shading (used on PS2) and per-pixel shading (used on original Xbox).
Shadow Mapping
Severance: Blade of Darkness (2001) used shadow mapping.
Turns out, you can solve problem of calculating shadow with creative usage of depth buffer. First, you render scene from point of view of light with depth buffer. After that is done, you now have a texture that has all geometry that is directly visible from the light. Any other geometry, that can not be seen from lights point of view would then appear in shadow. Using that texture you can check whether a point on surface is visible or not.
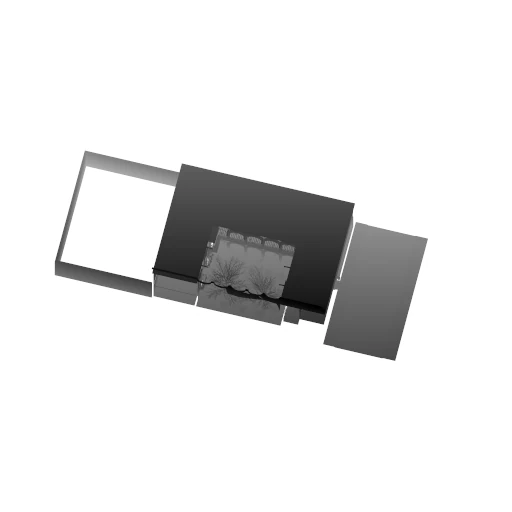
Here’s an example of how such shadowmap can look. Click for see full resolution image.
Programmable Shaders
Nvidia’s Tech Demo Chameleon (2001) used programmable shaders
Real-time graphics are only really feasible when rendered by a GPU. But up till this demo, GPUs were not able to perform arbitrary calculations. All calculations you needed for simple lighting and shadow map usage were performed by specialized hardware, which were not capable to run arbitrary programs.
This demo shows one of the first examples of “shaders”. Shader is just a program that can run on a GPU. There are multiple types of shaders, but first one to appear are Vertex and Pixel shaders. Vertex shaders are executed per-vertex, and they calculate properties of a vertex they are executed for. While Pixel shaders are executed per-pixel, and in the simplest terms, responsible for calculating final color of a pixel.
This demo shows what Pixel shaders can acomplish, specifically how pixel shaders allow surface to change its properties based on certain conditions.
Compute Shaders
Battlefield: Bad Company 2 (2010) used Compute Shaders.
As the name suggest Compute Shaders is a new shader type. Unlike Vertex or Pixel shaders, they are not tied to graphics directly, you don’t need any geometry to start compute shaders. The only thing you need is the shaders itself, and a number of instances to run. That allows for great flexibility of what can be done with those.
The way it was used in Battlefield: Bad Company 2 is quite interesting. First, all geometry is rendered, but instead of calculating lighting immediatelly, we save information about each pixel in textures, to calculate lighting later. After all geometry was rendered, we calculate lighting for all pixels with compute shader. One of the benefits for doing that is that you can pre-calculate list of lights that affect each portion of the screen, as by the time all geometry is rendered, you have complete depth buffer and can calculate bounding box of each portion of a screen.
It is important to note that compute shaders can also be used to perform arbitrary, non-graphics calculations. One example would be to fluid simulations. You can run such simulation right in your browser - Approximate grid SPH by michael0884.
Hardware accelerated raytracing
Battlefield V (2018) used Hardware accelerated raytracing.
Up until now, real-time computer graphics used approach of going over all geometry to figure out what each pixel gets. With ray-tracing, you would go other way around, from pixel to geometry. First, you build an “Acceleration Structure”, that contains geometry you are interested in, then, you are able to query it for intersection with rays. For example, to figure out which geometry is visible at a given pixel, you would cast a ray from camera, that corresponds to a given pixel, and the closest geometry hit by that ray, is the geometry that is visible for a given pixel.
Why is all of this important?
Despite the fact that the history of real-time graphics spans many decades, all those concepts and ideas are still used today. Every single thing described here, is still available and used in practice in modern applications.
Sources
Some of that info was found on Ultimate history of video games website.


